Pages

Showing posts with label shaker card. Show all posts

Sunday, June 24, 2018

I Believe in You


I Believe in You


Hello friends! 

I'm here to share the most recent card that I finished for the IG Crafty Crew July Challenge (I'm a bit early) to make a cheer up or encouragement card using sequins and/or jewels.

If you want to participate on IG, use the hashtag: #igcc180710e 


Here is the card:


To start, I took a piece of watercolor paper (no idea what brand) and began blending several colors of Distress Ink:  Festive Berries, Candied Apple, Squeezed Lemonade, Cracked Pistachio, Salty Ocean, Wilted Violet

Next, I sprinkled water droplets over top and then spritzed Perfect Pearls lightly over the paper. After heat setting, I die cut the paper and made a shaker card. That's it!

I never separated the die set and after playing with them all together, I don't think I will ever cut them apart. haha


Here are some more photos:


Simon Says Stamp sentiment: I See You (no longer available), heat embossed with Hero Arts White embossing powder on SSS Black card stock
SSS Die set: Dot Circles


Thanks for stopping by and have a beautiful day!


Friday, January 22, 2016

January 2016 CDD New Release

Welcome to the CDD January Stamp & Die Release Blog Hop. 
All stamps & Dies are in the CDD Shop and now available for purchase HERE.


Here's what I've created for you!


For my first project, I made a tag with the Stitched in Circle Dies and the hedgehogs from the new Lovies stamp set. 

Using the three largest dies, I began die cutting circles out of Neenah Solar White and adhered the two pieces together on the back so they stayed as one piece. So there wasn't too much white around the shaker, I used Copic Y02 around part of the die cut to add a pop of color.

To make the shaker, I sacrificed a stamp envelope and die cut it with the largest die from the Stiched in Circle Dies. After receiving the heart sequins, I had an idea to make a shaker with the blue for the sky and the green for the grass. I easily achieved this by using my Fuse tool to make the divide to keep the two colors separate, sealed it and set it aside.


Next, I wanted to try no line coloring on the hedgehogs so I second generation stamped them with Antique Linen Distress Ink and colored them with various Copic markers. For the sentiment, I stamped, "Hedge over heels for you," on a scrap of Neenah Solar White in Versafine Onyx Black. I cut the scrap piece of paper down, cut a quick banner and adhered it to the shaker.


After adhering everything together, I liked the shaker so much that I didn't want to put it on a card base. I ended up making it a tag. I had never made a tag until now so although it's probably a bit large, I'm happy with the end result! :)

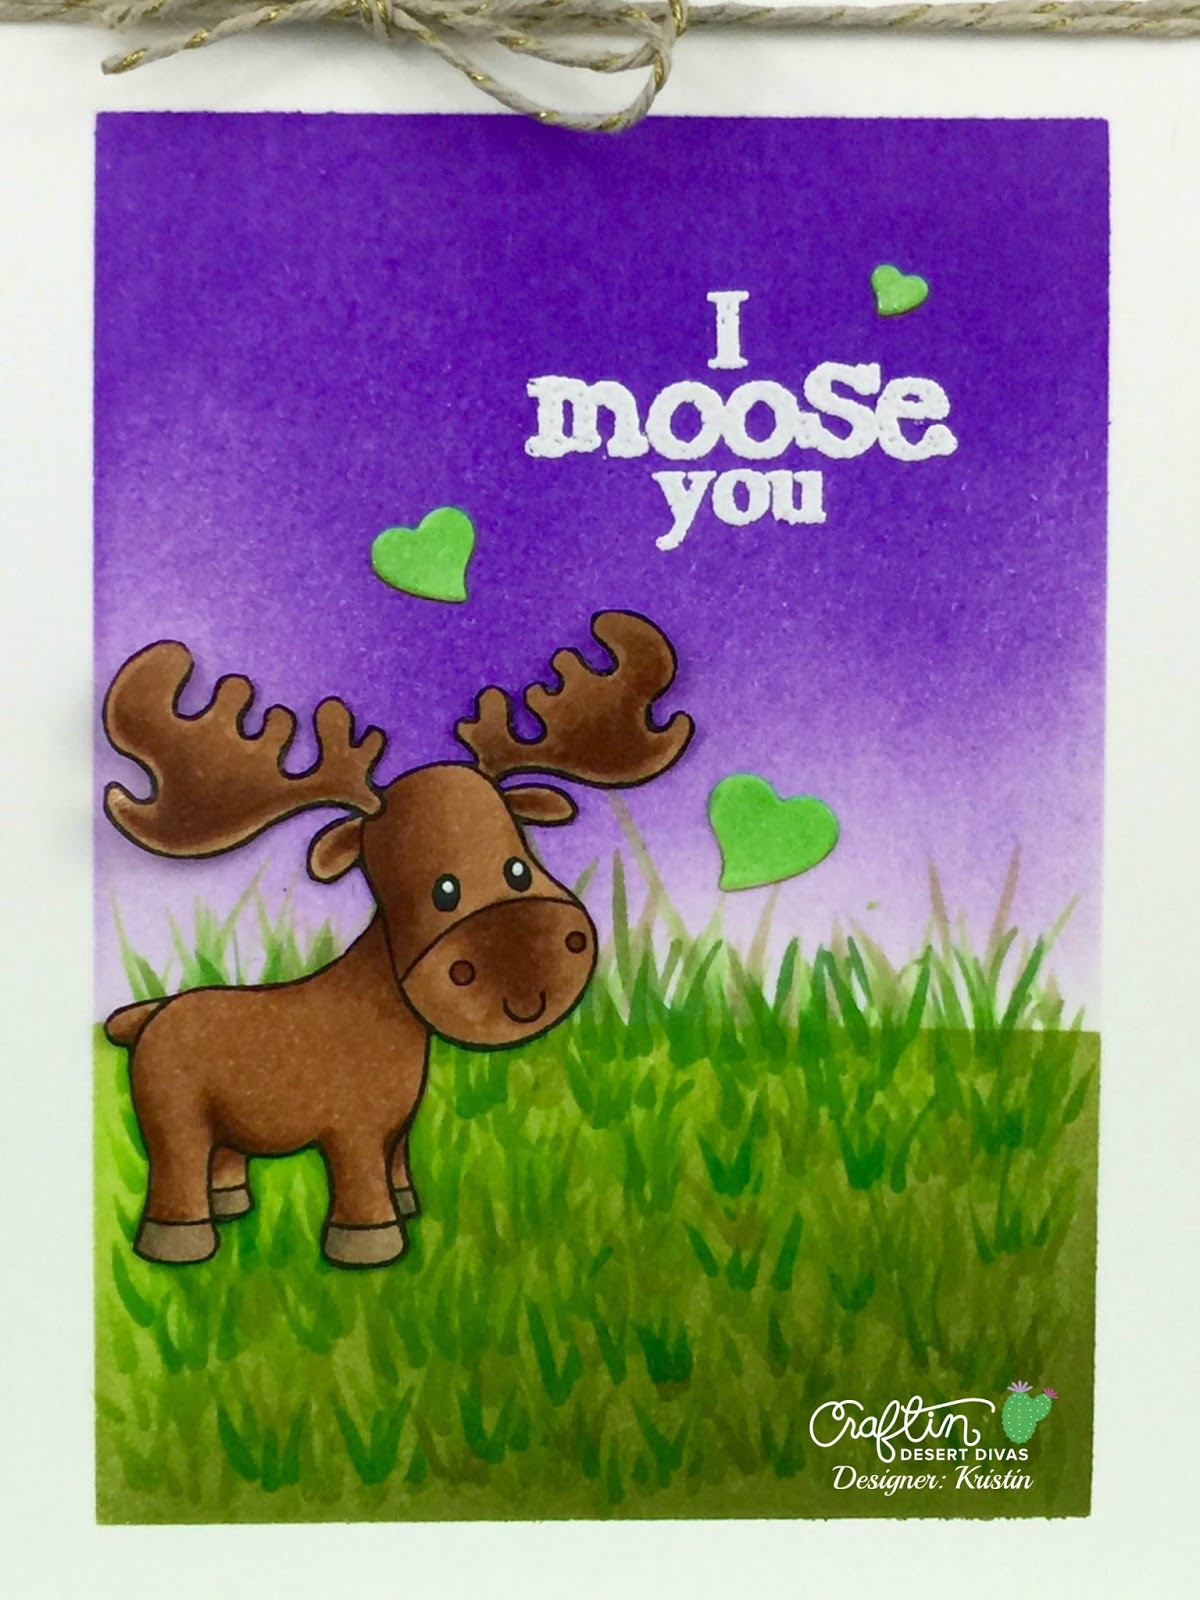
Here is my second card:


For my second moose card, I wanted to put the moose on green vegetation to make up for the desert card. 

I started by masking off the edges of the card base about an inch in on all sides. I wanted to try using the Distress Ink color, Wilted Violet for the sky and I blended Shabby Shutters and Twisted Citron into the ground. To soften the harsh line I had created with the mask, I brought out several colors of green Copics and began flicking them randomly over the Distress Ink.


Next, I stamped the moose with Memento Tuxedo Black ink and colored him with various Copic markers. After I fussy cut the moose, I added a touch of Clear Wink of Stella to the tips of his antlers. 


I used the sentiment that comes in the mini stamp set, I moose you, and stamped it on the card base with Versamark ink and heat embossed it with white Hero Arts embossing powder. 


To finish the card, I decided to add a few of the hearts that were left over from the heart die in the Heart of Heart Dies set and a small bow made of bakers twine. I colored the hearts green and adhered them to the panel. As a final touch, I added Clear Wink of Stella to the hearts and was done.


Here are the specials for this release:


**ALL SEQUIN MIXES will be on SALE for $1.00 EACH!! 


**FREE SHIPPING on all orders placed, no code necessary!!

Enjoy this special for in stock items only thru 1/31 at 10pm MST

All Stamps and Dies are made in the USA.

**We will be giving away $50 DIVA DOLLARS to one lucky winner to spend in the CDD shop. 
All you have to do is join us for our 2 day hop and leave a comment on each project. The more you comment the more chances you have to win!! Winner will be announced on Monday.

We hope you have enjoyed this release and will join us again tomorrow for more projects.

Your next stop is the super talented: 

Leah! - http://leahschaeffer.blogspot.com/

Thank you for stopping by and enjoy the rest of the hop! Have a beautiful day! 


Saturday, October 24, 2015

CDD October Release

Welcome to the CDD Stamp & Die Release Blog Hop. 
All stamps & Dies are in the CDD Shop and now available for purchase.


Here's what I've created for you...


For my second card using the Chilly stamp set, I decided to make a shaker using the hat and snowflakes. 


I love to knit so I was excited to see this hat! I used a smaller die from the Fancy Frame Dies set to cut out a piece of Neenah Solar White and stamped the hat with Memento Tuxedo Black. The hat was colored with various Copic markers. I brushed Clear Wink of Stella over the red areas on the hat. To add a small border, I used a Sakura Stardust Glitter Pen. 


I used another die from the Fancy Frame Dies to cut the shaker window.

 For the background of the shaker, I pulled out some papers from Pink Fresh Studio and stamped several of the snowflakes from the stamp set on the paper using Hero Arts Unicorn White. I wanted to use the sentiment, Warmest Wishes, and a snowflake on the acetate so I used Stazon Opaque White so it would stay put.


To finish the card, I added some Merry Mix and Snow Palace sequins and tied some red and white twine around the lower half of the card and I was done!


Here are the specials for this release:

**FREE MINI BANNER DIE to the first 60 orders (purchase must be $40 minimum before tax & shipping, one free banner per address) PLUS 1 BAG OF FREE SEQUINS on all orders placed on 10/23-10/25, no code necessary!! Ends 10/25 at 10pm MST. Just leave your choice of sequins in the comment section as you place your order. Stamps & Dies are made in the USA.


Here is today's SVG freebie. Each stop along the way there will be a code letter that spells a word for the freebie code. You must comment and follow each blog in order to get the free file. The file will be available in the shop at craftindesertdivas.com just for that day. Just add it to your cart and enter the letters you collected at each stop for the special code word at checkout to receive your free file download. **The code word and free file will be available that day ONLY so please be sure to visit the link.


I hope you have enjoyed this release and will join us again tomorrow for more projects.


Your code letter from me is: A

Your next stop is the super talented: Saundrahttp://luvscrappingtogether.blogspot.com/


Thursday, October 22, 2015

A Halloween Hello!


Hello and Happy Thursday!


Today I'm sharing a Halloween card using Witch Way is the Candy? from My Favorite Things. This is a stamp set I received last year and all I did was color the images. I thought since it's that time again I would make an actual card! 

To start, I wanted to create a background using the oh-so fun ink smooshing technique. Using my Gansai Tambi watercolors, I used a paintbrush to pick up the color and made a small watercolor puddle on my craft sheet. Next, I used a stamp envelope to pick up the color and place and smoosh it onto the watercolor cardstock. I repeated this until I liked my background. This sheet of cardstock was 5x7 so I cut it down to a quarter inch smaller than an A2 size. 


To prepare a shaker window, I used two Simon Says Stamp Stitched Rectangle dies. I used Tombo Extreme Adhesive to adhere the acetate to the window and adhere the watercolor panel to the card base. 


For the sequins, I used Jack-o'-Lantern and Trick or Treat from Little Things from Lucy's Cards. I also added a couple of black cat sequins from the Spellbound sequin pack. These sequin packs have so much included that I wanted to dump the whole bag into the shaker area! haha


I chose the sentiment, A Halloween Hello. I die cut a banner and cut it down so it was small enough to fit in the corner. Then I heat embossed the sentiment using Versamark ink and Hero Arts White embossing powder. 


Next I die cut a few spiders out of black cardstock using the Scary Spiders from Memorybox. I am absolutely terrified of spiders so why I have this die in my possession is a mystery. I kept checking to make sure I had the paper spiders and I wasn't accidentally picking up a real spider! Oh, the joys of living in Colorado. 


The only thing left was to add the images I colored last year. I wanted to make it look like the frog and cat were just as worried about the spiders as I would be if such a thing was happening. They look sufficiently worried about the spiders and I am satisfied. Now to mail this out as soon as possible!

Thank you for stopping by and have a beautiful day!

Kristin